VPN
All students can use AU-ACCESS VPN. It is not necessary to contact IT-support to get access.
When you are connected to AU-ACCESS VPN you will have access to the same services as if you were on Eduroam on campus.
Please note: In order to be able to log on to VPN, your AU account must be connected to two-factor authentication.
If your account is not connected to two-factor authentication, you can find the two-factor authentication setup guide here
Please use au[AUID]@uni.au.dk - eg. [email protected] - as username.
How to install VPN client on PC or Mac
How to install VPN client on PC or Mac
You might need to set up Two-factor authentication in order to login.
VPN Client for Windows
1. Click on Windows Cisco Secure Client .
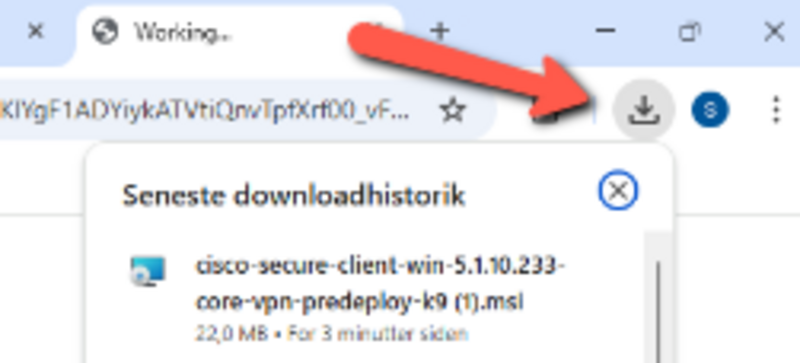
2. In the upper right corner, click on the download icon and then click on the Cisco Secure Folder

4. Follow the on screen instructions.
5. Once the install finishes, you can open your VPN Client by searching for “Cisco Secure Client”.
If you need to install the client for a Windows (Arm64) version, this can be downloaded from software.au.dk
VPN client for MacOS
1. Click on the link MacOS Cisco Secure Client
2. Open the downloaded package and follow the on screen instructions. Only install the module “Core & AnyConnect VPN” as shown on the screenshot above
3. Once the install finishes, you can open your VPN Client by searching for “Cisco Secure Client”.
How to logon to VPN from your PC
How to logon to VPN from your PC
In order to log on to VPN, Cisco AnyConnect must be installed. See guide below how to install on your computer.
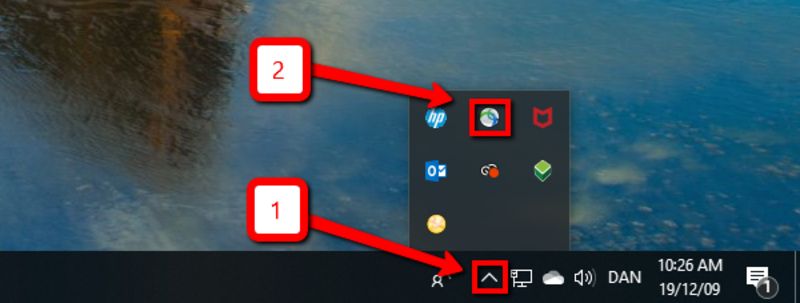
1. Click the small arrow in the task bar at the bottom right-hand corner of the screen.
2. Click the Cisco AnyConnect icon.
If you cannot see the icon, search by writing ‘Cisco Secure Client’ in the start field and try to open the program this way.
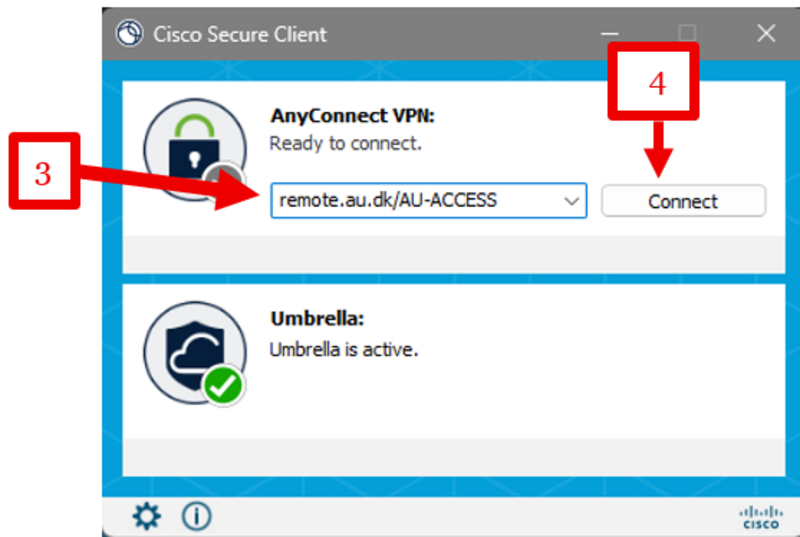
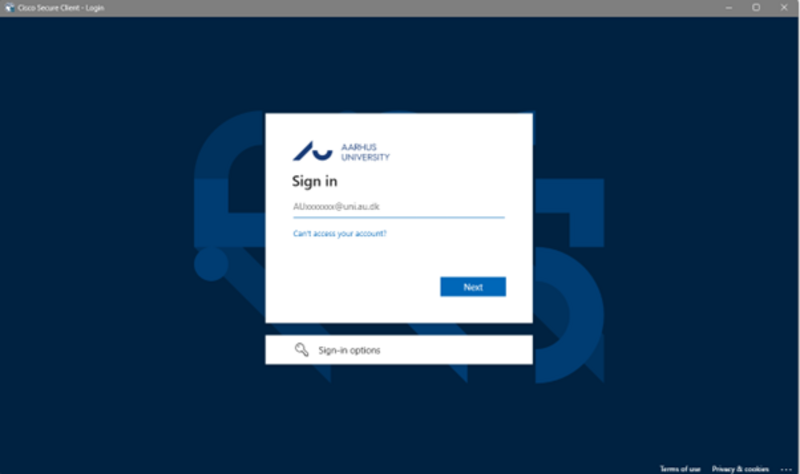
6. Enter the password you use for mitstudie.au.dk
7. Select your MFA (Two-factor authentication) method and follow the onscreen instructions on how to authenticate.
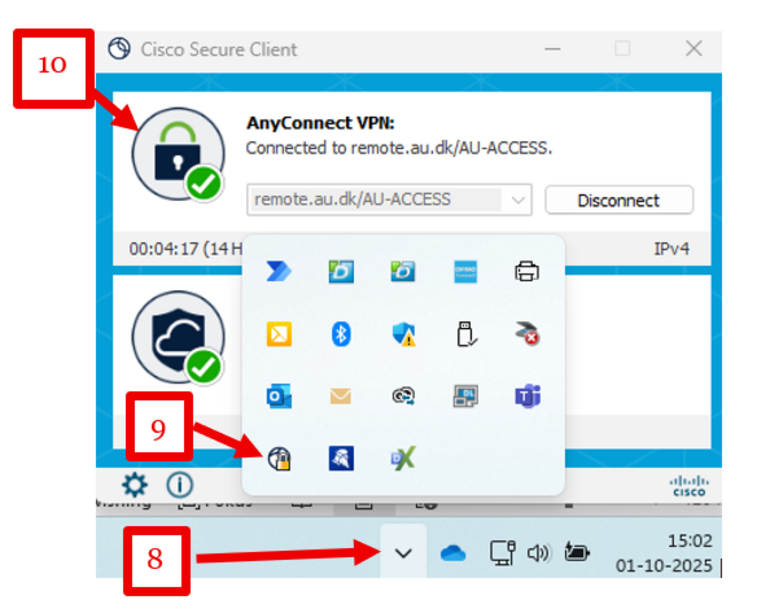
8. You can now check to see whether you are connected to VPN by clicking the small arrow in the task bar.
9. Then click the Cisco AnyConnect icon.
10. If you see a green checkmark on a padlock, you are connected to VPN.